写博客其实是对自己工作经验和学过程的总结,可能写得不好,但是还是希望自己踩过的坑能让更多人去避开我们踩过的坑。所以,在自己记录的同时,更希望帮助更多的人去解决一些问题。但是我们写的东西别人一直都搜索不到,怎么办呢?要让别人知道,要么就是自己主动分享,要么就是朋友们自己搜索,我们今天是来说后者,那就是如何让百度收录我们的博客。
百度搜索其实还是挺严格的,它回去分析你博客的质量,如果质量太差也不会收录,当然这需要多学多练多写多总结。我们这次只总结搜索引擎的SEO优化。
生成sitemap
这里我们需要安装三个插件
1
2
| npm install hexo-generator-sitemap --save-dev # 传统的sitemap
npm install hexo-generator-baidu-sitemap --save-dev # 百度sitemap
|
插件安装完成后,执行hexo g后,会在public目录下生成sitemap.xml和baidusitemap.xml文件,我们留着备用。
缩短Hexo生成的URL目录层级
根据其他的SEO经验,URL层级越短越容易被抓取,有助于提升搜索结果排名,建议保持最多三个层级。默认情况下,Hexo给我们生成的规则是:
1
| permalink: :year/:month/:day/:title/ # 目录为 https://domain/year/month/day/title/
|
目录层级有点,我们需要优化一下:
1
| permalink: :year-:month-:day/:title.html # 目录为 https://domain/year-month-day/title.html
|
或者安装另外一个插件hexo-abbrlink,它(github)可以简化我们的URL,它的配置参数效果如下:
1
2
3
4
5
6
7
8
9
10
11
12
|
crc16 & hex
https://blogs.52fx.biz/posts/66c8.html

crc16 & dec
https://blogs.52fx.biz/posts/65535.html

crc32 & hex
https://blogs.52fx.biz/posts/8ddf18fb.html

crc32 & dec
https://blogs.52fx.biz/posts/1690090958.html
|
1
| npm install hexo-abbrlink --save
|
然后修改根目录_config.yml中的配置,
1
2
3
4
5
| posts/:abbrlink/
# abbrlink config
abbrlink:
alg: crc32 #support crc16(default) and crc32
rep: dec #support dec(default) and hex
|
添加 nofollow 标签
据百度百科介绍:
nofollow标签是由谷歌领头创新的一个“反垃圾链接”的标签,并被百度、yahoo等各大搜索引擎广泛支持,引用nofollow标签的目的是:用于指示搜索引擎不要追踪(即抓取)网页上的带有nofollow属性的任何出站链接,以减少垃圾链接的分散网站权重!简单的说就是,如果A网页上有一个链接指向B网页,但A网页给这个链接加上了 rel=”nofollow” 标注,则搜索引擎不把A网页计算入B网页的反向链接。搜索引擎看到这个标签就可能减少或完全取消链接的投票权重。
所以我们需要对我们的Hexo的超链接加上这个标签。我的路径是themes\icarus\layout\common\footer.ejs:
1
2
| Powered by <a href="https://hexo.io/" target="_blank">Hexo</a> & <a
href="https://github.com/ppoffice/hexo-theme-icarus" target="_blank">Icarus</a>
|
改为:
1
2
| Powered by <a href="https://hexo.io/" target="_blank" rel="external nofollow">Hexo</a> & <a
href="https://github.com/ppoffice/hexo-theme-icarus" target="_blank" rel="external nofollow">Icarus</a>
|
百度站长提交连接
我们先登录到百度的站点管理,没有账号的请自行注册。然后我们点击添加站点
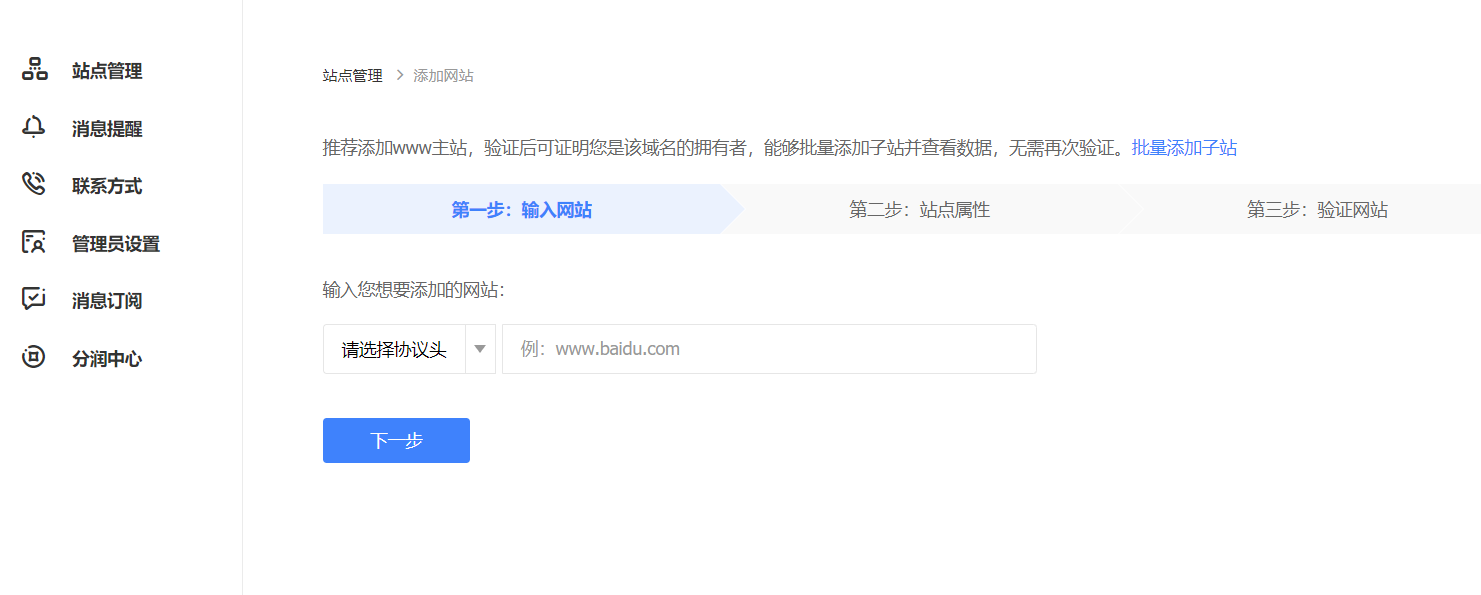
这里根据自己的实际情况填写然后下一步,自己勾选,然后再下一步。就是验证域名
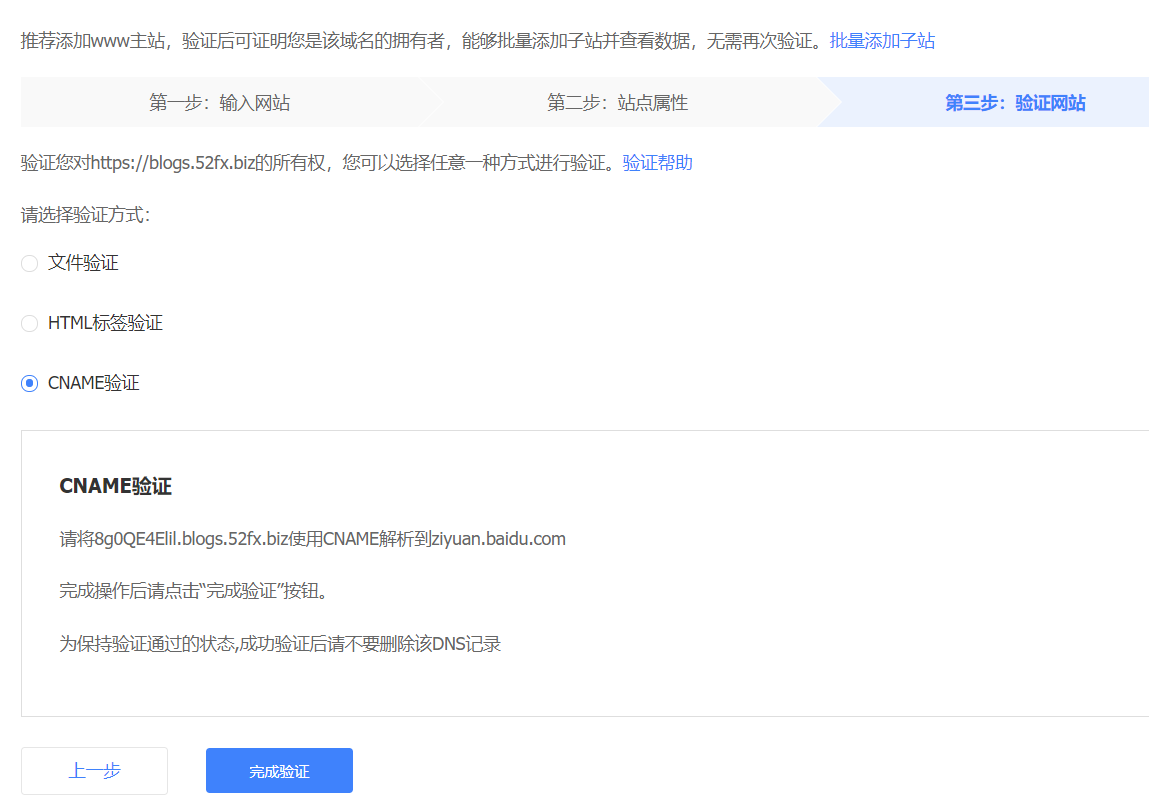
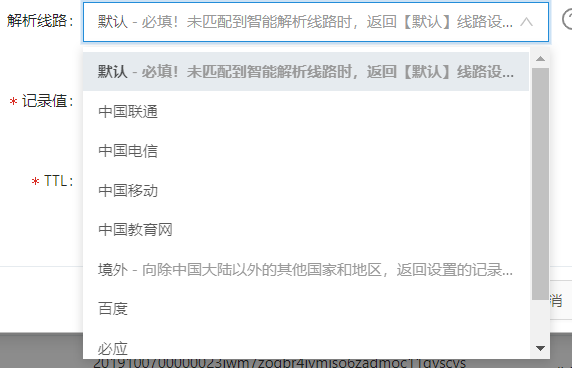
这里于三种方式,都有详细的说明,我选择的第三种CNAME验证,大家自行选择。
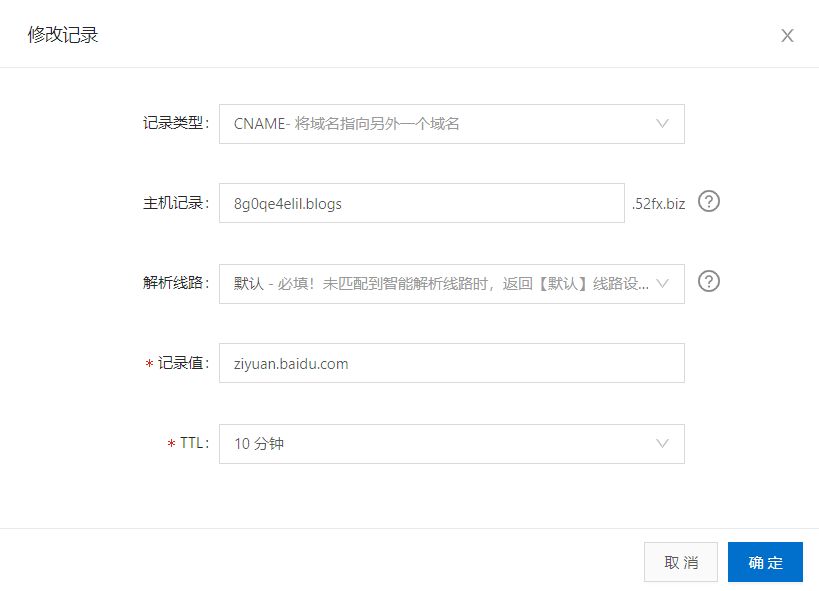
解析完域名后稍等数分钟,点击完成验证,然后就OK,接下来我们生成sitemap文件并上传到七牛云,为什么要上传到七牛云呢,因为github禁止了搜索引擎爬虫,会导致百度抓取失败。或者把静态页面分别放置在github和coding上面,针对百度解析到不同的服务器上。
至于如何提交到七牛云,请翻看我之前的文章,这里不再赘述。在生成之前切记要修改_config.yml的url属性.现在我们来访问一下http://blogs.52fx.biz/sitemap.xml可以看到
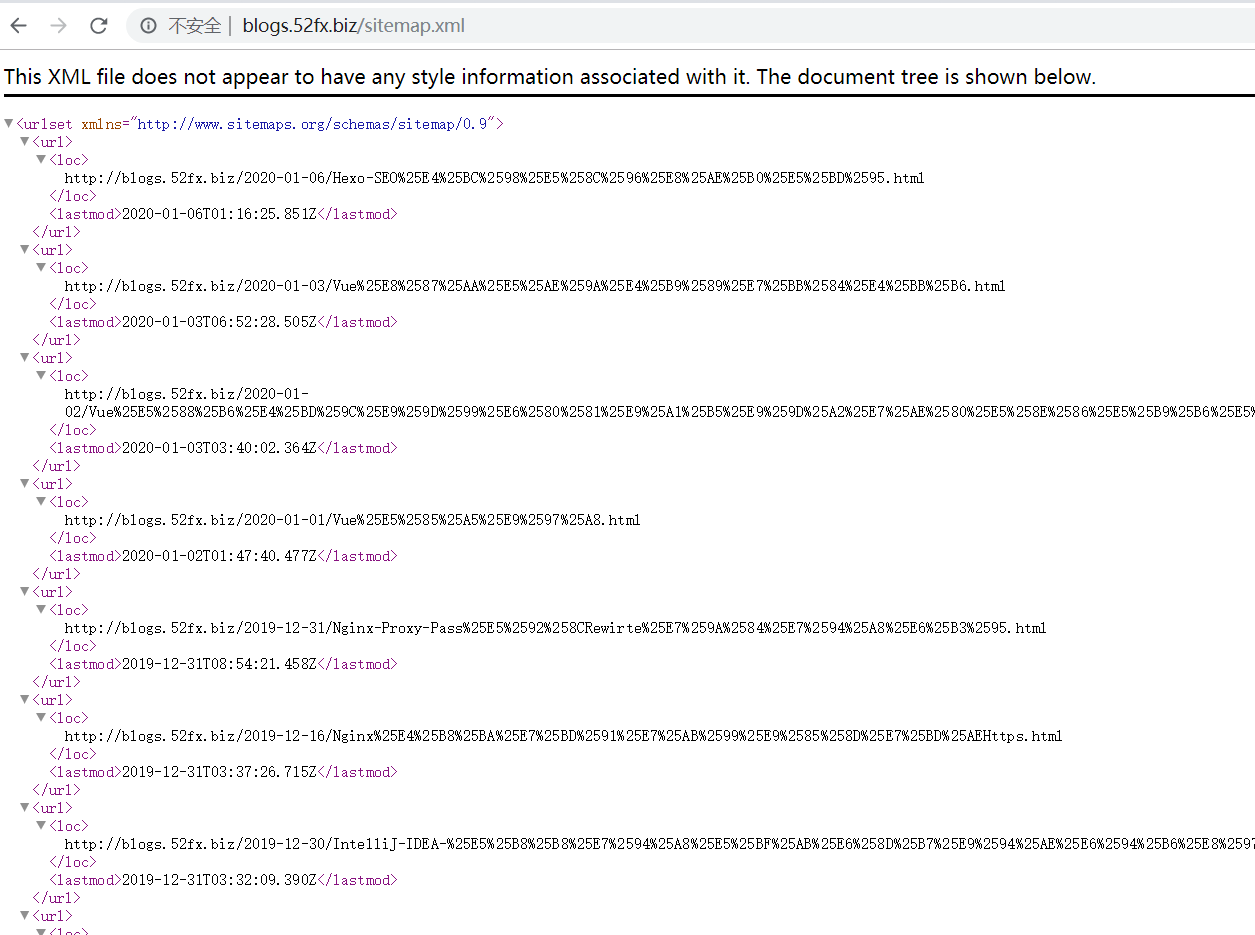
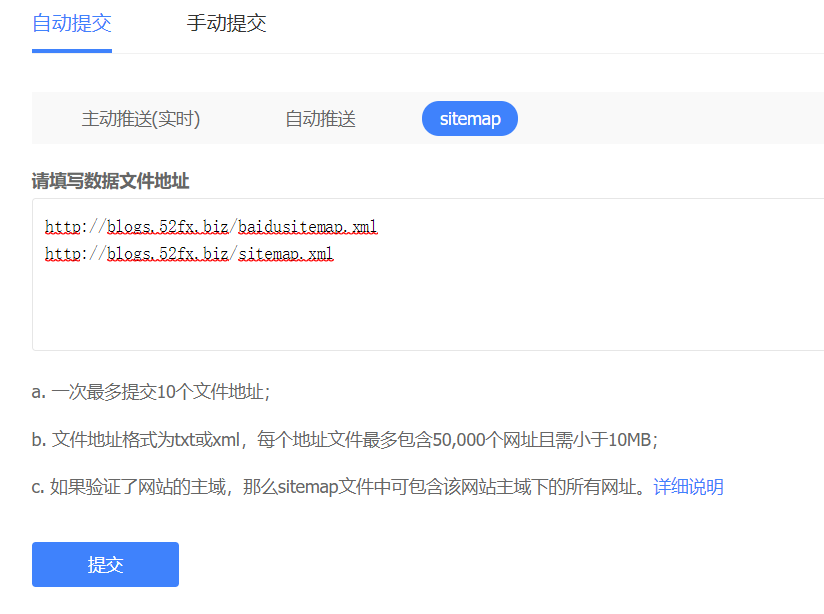
接下来,把我们的sitemap文件提交到百度自动提交配置中.进入链接提交->自动提交->sitemap进行配置.
提交后会有一个抓取队列
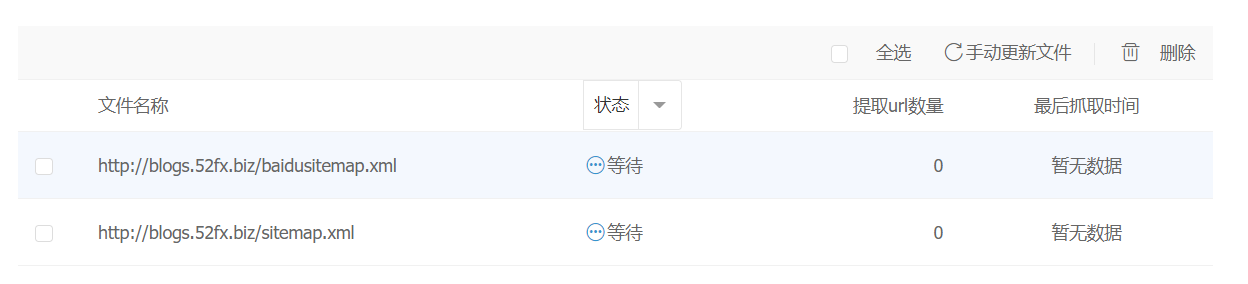 ,
,
可以时刻关注状态,但是这种方式有点慢。大家看上面的图片,也能知道有三种方式提交,上面只是其中一种,还有两种,我们来分别讲解一下
自动推送这种方式,也比较简单,在对象的主题的footer.ejs中加入:
1
2
3
4
5
6
7
8
9
10
11
12
13
14
| <script>
(function(){
var bp = document.createElement('script');
var curProtocol = window.location.protocol.split(':')[0];
if (curProtocol === 'https') {
bp.src = 'https://zz.bdstatic.com/linksubmit/push.js';
}
else {
bp.src = 'http://push.zhanzhang.baidu.com/push.js';
}
var s = document.getElementsByTagName("script")[0];
s.parentNode.insertBefore(bp, s);
})();
</script>
|
即可,每次访问的时候,页面就会向百度提交。
主动推送(实时),这个就需要我们安装一个插件:
1
| npm install hexo-baidu-url-submit --save
|
然后在_config.yml配置
1
2
3
4
5
6
7
8
9
10
11
12
13
14
15
16
| deploy:
- type: git
repository:
github: git@github.com:51offer-tech/51offer-tech.github.io.git
#coding: git@git.coding.net:offer-tech/51offer-tech.git
coding: https://e.coding.net/offer-tech/offer-tech.git
gitee: https://gitee.com/eyiadmin/offer-tech.git
branch: master
- type: baidu_url_submitter
# 百度链接自动提交
baidu_url_submit:
count: 1000 ## 提交最新的一个链接
host: http://blogs.52fx.biz ## 在百度站长平台中注册的域名
token: xxxxxxxx ## 请注意这是您的秘钥, 所以请不要把博客源代码发布在公众仓库里!
path: baidu_urls.txt ## 文本文档的地址, 新链接会保存在此文本文档里
|
详细的资料大家可以去hexo-baidu-url-submit 的github查看.
Hexo Keywords关键字设置
由于我用的hexo-theme-icarus,我也没有过多的去查找资料,就直接在page.js中手动加了一个:
1
2
3
4
5
6
7
8
9
10
11
12
13
14
15
16
17
18
19
20
21
22
23
24
25
26
27
28
29
30
31
32
33
34
35
36
37
38
39
40
41
42
43
44
45
46
47
48
49
50
51
52
53
54
| hexo.extend.helper.register('page_keywords', function (page = null) {
page = page === null ? this.page : page;
let title = page.title;
if (this.is_archive()) {
title = this._p('common.archive', Infinity);
if (this.is_month()) {
title += ': ' + page.year + '/' + page.month;
} else if (this.is_year()) {
title += ': ' + page.year;
}
} else if (this.is_category()) {
title = this._p('common.category', 1) + ': ' + page.category;
} else if (this.is_tag()) {
title = this._p('common.tag', 1) + ': ' + page.tag;
} else if (this.is_categories()) {
title = this._p('common.category', Infinity);
} else if (this.is_tags()) {
title = this._p('common.tag', Infinity);
}
let keywords=page.keywords;
const siteTitle = hexo.extend.helper.get('get_config').bind(this)('title', '', true);
keywords=keywords||hexo.extend.helper.get('get_config').bind(this)('keywords', '', true);
return [title, siteTitle,keywords].filter(str => typeof (str) !== 'undefined' && str.trim() !== '').join(' = ');
});
hexo.extend.helper.register('page_description', function (page = null) {
page = page === null ? this.page : page;
let title = page.title;
if (this.is_archive()) {
title = this._p('common.archive', Infinity);
if (this.is_month()) {
title += ': ' + page.year + '/' + page.month;
} else if (this.is_year()) {
title += ': ' + page.year;
}
} else if (this.is_category()) {
title = this._p('common.category', 1) + ': ' + page.category;
} else if (this.is_tag()) {
title = this._p('common.tag', 1) + ': ' + page.tag;
} else if (this.is_categories()) {
title = this._p('common.category', Infinity);
} else if (this.is_tags()) {
title = this._p('common.tag', Infinity);
}
let description=page.description;
const siteTitle = hexo.extend.helper.get('get_config').bind(this)('title', '', true);
description=description||hexo.extend.helper.get('get_config').bind(this)('description', '', true);
return [title, siteTitle,description].filter(str => typeof (str) !== 'undefined' && str.trim() !== '').join(' , ');
});
|
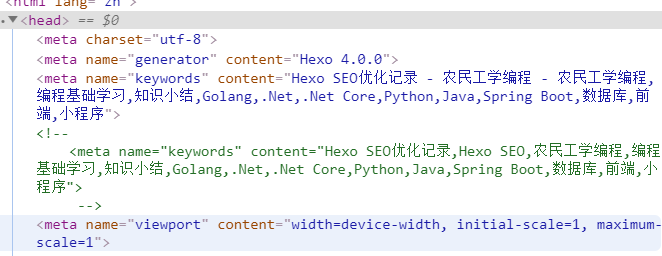
然后在主题的head.ejs中加上:
1
2
3
| <meta name="keywords" content="<%= page_keywords() %>">
<meta name="description" content="<%= page_description() %>">
<meta name="viewport" content="width=device-width,initial-scale=1.0, minimum-scale=1.0, maximum-scale=1.0, user-scalable=no"/>
|
最终效果
使用HTTPS
据说百度会给https的网站加权。我这里是直接配置的七牛云免费的SSL证书,当然是需要费用的,不过也很便宜
1
2
3
| 第 0 GB 至 100 TB (含) 0.28 元/GB
第 100 TB 至 1024 TB (含) 0.23 元/GB
第 1024 TB 以上 0.18 元/GB
|
未完待续,持续更新中.

